
Official websites use .gov
A .gov website belongs to an official government organization in the United States.
Secure .gov websites use HTTPS
A lock (
) or https:// means you’ve safely connected to the .gov website. Share sensitive information only on official, secure websites.
Creating Individual Accounts (under Agency)
The following steps are required for an Agency to create an iEdison account:
1. Navigate to "Manage Profiles"
Login into the iEdison system and navigate to "Manage Profiles" in the sidebar and click "User Profiles." NOTE: if the "User Profiles" menu item does not appear in your account, then check to see if you are a user or an admin for your agency. Only admin accounts have the ability to create/invite new users.
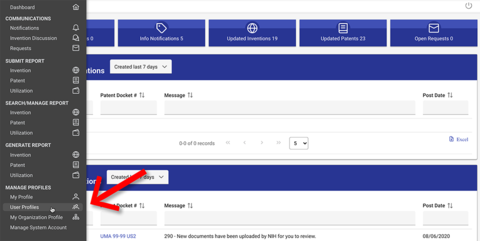
2. Click "Invite New User" button
In the "Manage Agency Users" display, you will see a list of users with an invited, active, or inactive status. In the upper-right corner, click the "User Profiles" button to begin the process.

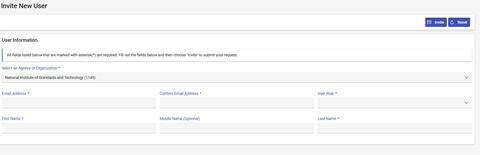
3. Complete the New User form
Mandatory fields are marked with an asterisk(*). If the user has a profile in the database, their information will auto-populate as you input text. If the information doesn't populate, the user is not in the database.
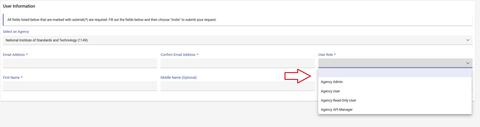
In the "User Role" field, you will have the option to assign the user a specific role as an "Agency Admin," an "Agency User," an "Agency Read-Only User," or "Agency API Manager."
Changing a User's Role
If you need to change a user’s role on the iEdison system, navigate to Manage Profiles in the sidebar main menu, then User Profiles, find the user you want to change, and click “Visit Profile.”

Under Profile Details, click the pencil to edit their User Role. A pop-up will display where you can change the User Role from "Agency Admin," "Agency User," or "Agency Read-Only User." Click "Update Role" then "Confirm" to save the changes.

Changing a User's Role Status
If a user is no longer at your Agency, you will need to change their User Role Status to "Inactive." In the Profile Details section, click the pencil and under User Role Status, select "Inactive" and click "Update Role" then "Confirm" to save the changes.

4. Invite/Confirm
When you have completed all sections, click "Invite," and a popup window will display the information for your review.
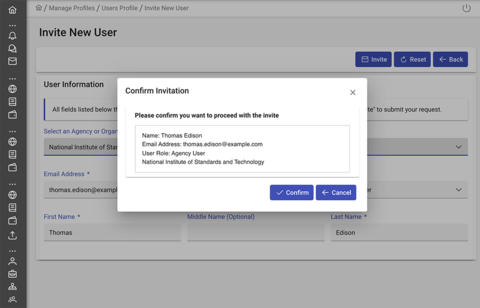
If the information is correct, click "Confirm" to complete the process. After your confirmation, the invitee will receive an email to verify and complete the application process.