New Vacuum Calibration System: Better, Faster, and Cheaper

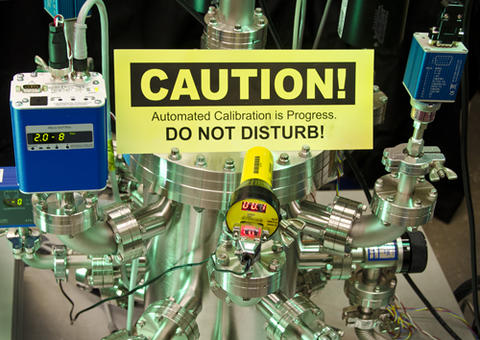
The new, automated Vacuum Comparison Standard can accommodate up to 10 customer gauges of different types at once, with calibration times in the two- to three-hour range.
In the vacuum business, less is more—except when it comes to accuracy. Industries that depend on high-quality, carefully monitored vacuum for sensitive processes such as microchip fabrication, as well as researchers in numerous technology fields, defense R&D work, and academic science, require high-precision sensors calibrated to authoritative standards.
But until recently, getting direct NIST traceability for vacuum gauges has been a time-consuming and relatively expensive process. Calibrating a customer gauge against one of the national primary standards (that is, one of NIST's Ultrasonic Interferometer Manometers, or UIMs) "usually takes about fifty hours of data-acquisition, followed by a couple of days to write a report," says Jay Hendricks, who is in charge of Low Pressure Manometry in PML's Sensor Science Division. "It's all done manually, with a lot of down time required for the system to pressurize and stabilize. The cost is about $5000, with a turnaround time of approximately eight weeks."
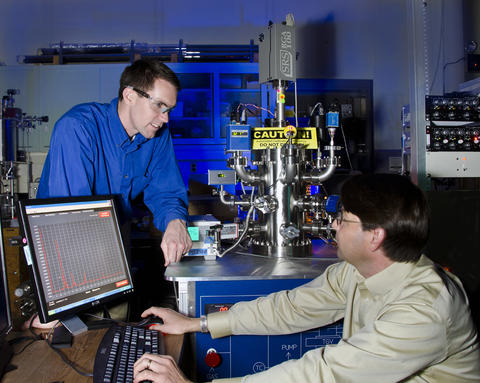
That excludes many potential customers without the requisite time or money. Now, however, even small businesses and labs can take advantage of a new, fully automated calibration system devised by Hendricks and colleague Jacob Ricker. "With this Vacuum Comparison Standard or VCS apparatus," Hendricks says, "we can accommodate up to 10 customer gauges of different types at once, with calibration times in the two- to three-hour range, enabling 'on- demand' service at much lower cost."
The system calibrates gauges over five orders of magnitude in pressure, from 0.65 Pa to 130,000 Pa. (The pascal, abbreviated Pa, is the SI unit of pressure. Standard atmospheric air pressure is about 101,000 Pa.) "That's the range in which most chemistry and physics goes on," says Ricker. "For example, on the low side it covers plasma etching, chemical vapor deposition, and sputtering. On the high side, it covers airplane or helicopter altimeters and barometric sensors that need to be traceable to NIST."
Measurement uncertainties in the new VCS device range from 0.1% at 13 Pa to 0.04% at 1,300 Pa to 0.01% or better at 130,000 Pa (k=2) "The manometers still have a much lower uncertainty, but at a significantly higher cost," Ricker says. "At those same pressures the UIM delivers 0.023%, 0.0007%, 0.0005% respectively. But this new system is designed for people who may not need all those zeros, or gauges that don't offer a part in 10-6 resolution."

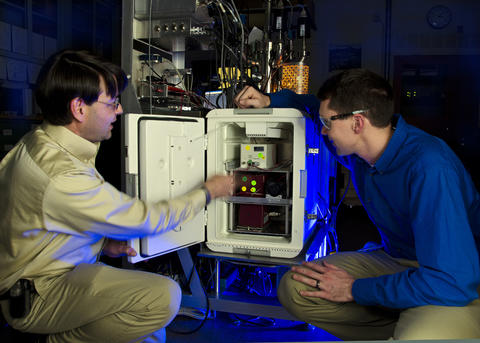
Setting up the new service demanded a great deal of custom software and hardware integration for automated control of flow and pressurization, as well as monitoring and data-collection. But the system's key element is an extremely accurate and stable transfer standard—a set of interconnected components informally called an "igloo" after the enclosure manufacturer. The device is so good that for most common industrial process vacuum-gauges, it eliminates the need to directly test against a primary UIM situated deep in NIST's Advanced Measurement Laboratories.
"We use these igloos to transfer the SI unit pascal from the UIM manometers to other NIST standards and DOD laboratories. We calibrate at least one a year against the primary UIMs," Ricker says. "We've been looking at the statistics, and they're very good. Pegging the long term drift uncertainty conservatively at 0.1%, that's a factor of five improvement over a stock pressure sensor. Some of them perform even better than that."
The latest version of the transfer standard, which has been under development for more than a decade in NIST's Pressure and Vacuum Group, combines two different kinds of low-pressure sensors enclosed in an insulated container the size of a suitcase that maintains a constant temperature within 5 mK.
Inside is a resonance silicon gauge (RSG) that monitors two capacitance diaphragm gauges (CDGs). RSGs are microelectromechanical systems (MEMS) that measure the effect of pressure- induced strain on the resonant frequency of a silicon oscillator. CDGs measure pressure-induced changes in the position of an alloy diaphragm that serves as one plate of a capacitor, and are the workhorse sensors for most high-precision vacuum operations.
That combination, Hendricks says, brings unique benefits: "CDGs have extremely fine resolution at low pressure. RSGs have outstanding long term drift stability—in the range of 0.01%, which is a factor of 10 better than the CDGs. So to get the best of both, we use an RSG to calibrate the CDGs. And that occurs every time we turn the system on.
"The software does an automatic calibration routine at the beginning of each test. It checks the CDGs against the RSGs, fills to several cardinal pressure points, and then does an on-site self-calibration—all only a few minutes before the system is used."

The result is a dramatic reduction in uncertainty. "Looking at the entire process," Hendricks says, "we get a factor of five improvement in the long term drift uncertainty by this calibration procedure and another factor of 10 from the igloo, so theoretically that's a total factor of 50 improvement. The rest of the world just has bare CDGs, and they send them here to NIST for calibration. That's how they get their transferred uncertainties.
"But this package is superior to the bare CDGs that most secondary calibration laboratories use as their standard. The new VCS system allows us to provide a calibration service with uncertainties way, way better than most labs in the United States."
Igloos and their related equipment are sent outside NIST for round-robin international comparisons. But they are not sent to customers, although that could happen in the future. However, "we haven't been shy about telling other people outside NIST, 'Hey you can do this, too!' And now we're seeing some of them are starting to build their own thermal-controlled enclosures," Hendricks says.
The new automated calibration system can handle almost any vacuum gauge that has a digital or DC output. That is important in view of the multiplicity of gauge types ("each decade of pressure has a preferred sensor type," Ricker says) and the recent trend is toward combination gauges, such as thermocouples paired with piezorestive sensors.
Those features, combined with a factor of five reduction in cost and significantly shorter turnaround time, is expected to increase the number of customers and provide services to a much wider range of users. Before the new system, Ricker says, "we would get phone calls from people with barometric sensors in their labs looking for calibration. They'd say something like, 'Our pressure sensor is important, but it's not super-important.' And we'd have to say, 'Well, okay, but it's still a $5000 calibration.' That's when they'd hang up the phone.
"But the new system allows us to do it a lot cheaper and basically just plug the sensors in. The computer takes the data, and we can go and help somebody else."
Many people contributed to development of the VCS system, notably including John Quintavalle and Jeffrey Kelley (software and apparatus fabrication) and collaborators Patrick Abbott, Justin Chow and Douglas Olson. Financial support was provided by Calibration Service Development.
Any mention or image of commercial products within NIST web pages is for information only; it does not imply recommendation or endorsement by NIST.

