The Half of It: Argentinian Metrologist Builds NIST-Inspired ‘Half-Angle’ Measurement System

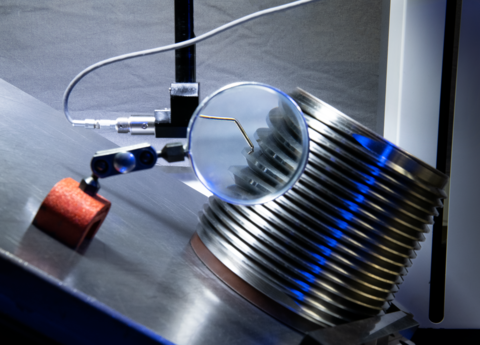
A close-up of a thread gauge sitting on the custom NIST half angle measurement system.
When Jorge Campbell, an engineer from Argentina’s National Institute of Industrial Technology (INTI), visited the National Institute of Standards and Technology (NIST) this past spring, his plan was to talk to NIST scientists about laser trackers, laser scanners, and other advanced instruments used for large-scale dimensional metrology.
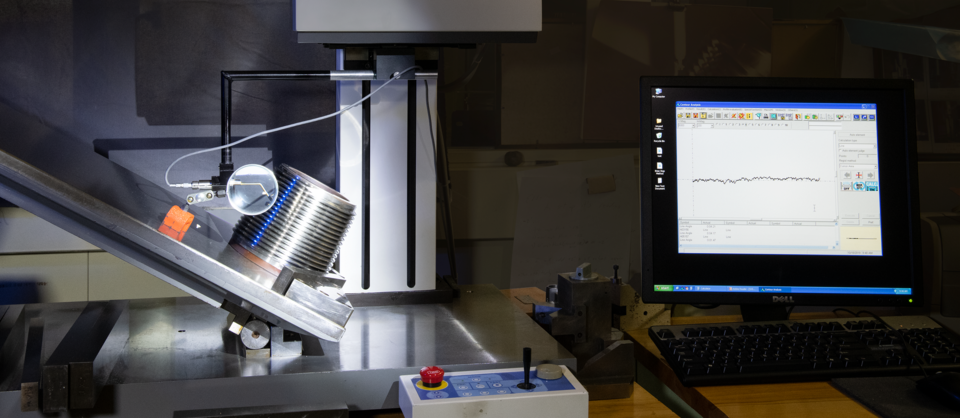
During his visit, he also toured several NIST labs. One machine that he saw particularly sparked his interest — a machine with a very specific purpose. This custom instrument, in the basement of one of the buildings on NIST’s Gaithersburg, Md., campus, is designed to measure a key part of an object called a thread gauge, used as a standard by the oil and gas industry to check the functionality of the threaded connections for pipes used in drilling operations.
Campbell was interested in this device because it gives researchers better results in significantly less time than he could get with the optical technique he relied on in Argentina.
“I needed better accuracy,” Campbell said. “But I also needed something more reliable, less subjective, less operator-dependent.”
Thread gauges are threaded screws and rings whose dimensions are extremely well-characterized. These objects are used to ensure that manufacturers are meeting their specifications for screws used for everything from the nuts and bolts you might buy at a hardware store to precision parts used in medical equipment, and also for the threaded connections used in oil and gas drilling operations.
Several dimensions are important for testing these gauges. One dimension that is tricky to measure is the “half angle” — literally, half the angle between the crest (outermost point) and root (innermost point) of the thread of a screw. If this angle is too wide or too narrow, it won’t pass inspections.
“Threads are very complex-geometry parts,” said NIST mechanical engineer Dennis Everett. “There are many critical components. One of them is the half angle of the thread.”
But the trouble with typical measurements of the half angle, he continued, is that “the most common way to do it is not terribly accurate.”
Most laboratories measure the half angle using a profile projector, Everett said. This type of machine illuminates the gauge and then magnifies the shadow cast by the object, giving the user an amplified two-dimensional view of the thread’s ins and out.
The technique can yield measurements with uncertainties that are typically too high for gauge manufacturers serving the oil and gas industry. American Petroleum Institute (API) standards specify tolerances as low as 5 arc minutes – less than a tenth of one degree – so small uncertainties are required to determine compliance.
Until his visit to NIST, Campbell was using a profile projector to measure half angles.
“When you optically measure a thread, there is a side that shadows on itself” due to the twisting helical shape of the thread, Campbell said. “On that side, you never know what you are seeing.” The technique is also “very laborious, tiring, and unreliable.”
Instead of an optical projector, the NIST machine Campbell saw on his tour uses a stylus that touches the sides (called “flanks”) of the thread gauge being measured. A metal plate sitting at an angle of 30 degrees supports the thread gauge as it is being scanned. The reason for the 30-degree angle of this plate is that thread gauges produced by API gauge manufacturers have a nominal half angle of 30 degrees. The NIST machine is used almost exclusively for API thread gauge measurements.

Uncertainties using the NIST half-angle machine are just plus or minus 3 arc minutes – about 0.05 degrees. The stylus is fitted with a transducer that converts motion into an electrical signal that can be measured to gauge the positions of the stylus as it traces the thread.
After visiting NIST and seeing Everett’s thread gauge lab, Campbell returned home and built his own half-angle measurement machine using a similar set-up.
“While he was here, he took a lot of pictures, took a lot of notes, asked a lot of technical questions, and then a few weeks later I got an email saying, ‘Thanks – look what I built!’” Everett said.
Campbell estimates that he’s cut his uncertainties on these measurements in half.
“I think what Jorge did was unique,” Everett said. “I don’t know that other people have done that.”
-- Reported and written by Jennifer Lauren Lee

